Tuesday, March 18, 2014

A Sitecore 7.2 feature worth the wait: Search-driven controls

As always, I want to provide both the technical and business benefits to a discussion topic.  I've written about this use case in the past, but with Sitecore 7.2 there is now an out-of-the-box feature that it makes the solution to it very straightforward and available to both the business and technical sides of the house.

Basically, since Sitecore controls are so flexible and can bind to a "datasource" based on any number of conditions, the ability to use search interfaces and results to drive this datasource is a natural improvement to the platform.

So take for example the controls on the right hand side of this page:

A Launch Sitecore "Contributor" page with added controls in the right column

The Articles control at the top is set up to look at a specific field of this "contributor" content type / data template.  All Articles have a checklist field so that we can appropriately credit our contributors with their article contribution.  In this way, the control is going to always show a full list of my articles without my having to go back to our development team and rework the control every time I write a new one (which, at any rate, is not all that often).

Similarly, the control below the articles control shows another list.  This list can be driven by a pre-built query against the entire content tree.  I've always been a fan of this technique, as we can create a nice bridge between our development team and our business team.  The business folks could describe in words what they want:

"I need a list of a all articles that have been tagged for Marketers".

Developers (or really anyone that has become familiar with Sitecore queries could come up with something like this item:
A pre-built search query item


In reality it isn't even necessary to be familiar with this search syntax since the "Build Query" feature within this Content Editor view would allow you to use the search interface within Sitecore to prepare the pre-built query item.  Once the item was built, now the business folks could use this item as a datasource for the control and our use case solution for an ongoing dynamic query control would once again be complete.

(In older solutions to this use case, we used the same technique as above, but used Sitecore Query notation).

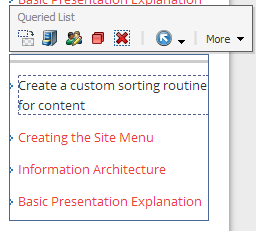
Now, in 7.2, using these search queries as control datasources is even more cool and direct.  Let's rework the control on our page.  The good thing is, Chris Castle's Launch Sitecore control is already written so well that it doesn't need changing:

Selecting the LS Queried List control for our page

As the dialog appears to select an associated datasource for the control, we can see that we now get the ability to Search for Content on the left (previously we would have chosen a specific content item):

Searching for associated content

There are two areas we could use here to come up with our result set.  The right hand side of the screen will show us the available facets (template, date range, author, etc.).  These facets are impressive by default and fully extensible to enable the inclusion of specific attributes important to your business.  In addition, the drop arrow on the left of the search box provides a choice to use pre-built search filters.  For the example below, I'll use this technique to choose:
  • Items that match the Article Data Template (they have to be Launch Sitecore articles)
  • Items that were initially created by Mike Casey
Both Template and Article are pre-built search filters, so I can easily choose them from the list.  There's also a nice "intellisense"-like feature that allows me to start typing and see available options based on my keystrokes.

Setting up the search query with pre-built search filters
If I click on the magnifying glass to run the query so far, I notice I have 65 results:

Initial search results for Mike Casey as author, Article as Data Template

My team will tell you that I haven't contributed nearly that many articles.  In fact, in the Template facet on the right, we see that of the 65 items returned, 22 were articles, 9 were images, and so on.  By default this is a logical "or" query, so we're getting too many results for our list's purpose.

By clicking to the left of each chosen search filter, we can toggle through a "must have", "must not have" "can have" logical operator set.  For our list, we want to ensure that both filter criteria are true:

Tweaking the query with logical operators
With the "Must Have" criteria in place and by clicking the magnifying glass again, we get the expected four article result, and we are satisfied with our search query:

Finished product

Now think about the fact that you can set up personalization or multvariate tests on this control using different search criteria.  The search criteria can be coupled with any other conditions Sitecore has access to (GeoIP, campaign, etc.).  You're off an running with a truly dynamic experience for your visitor.
 

Snippet for the Developers:

For the developers, the reason that this already works in your current Launch Sitecore package is that Chris Castle thought through the various datasource items that might be passed.  Here is a little snippet of the resulting logic if the datasource is deemed to be a query string (rather than a specific item GUID).  This full code is available via the DataSourceList.ascx control in the project:
 
        // if the datasource was not a query item try to process the datasource as a query
try
{
//Open search context based off the current item
using (IProviderSearchContext context = ContentSearchManager.CreateSearchContext((SitecoreIndexableItem)(Sitecore.Context.Item)))
{
string languageCode = Sitecore.Context.Language.CultureInfo.TwoLetterISOLanguageName.ToString();
IQueryable<Item> queryable = (from toItem in LinqHelper.CreateQuery(context, UIFilterHelpers.ParseDatasourceString(Attributes["sc_datasource"]))
where toItem.Language == languageCode
select toItem.GetItem());

// the master index will have each version so we need to remove the duplicates.
if (Sitecore.Context.Item.Database.Name.ToLower() == "master")
return queryable.ToList<Item>().Distinct(new ItemIDComparer()).ToList<Item>();
else
return
queryable.ToList<Item>();
}
}

Sunday, March 16, 2014

Checking with your own data to drive a Sitecore personalization condition

Why should I care about this?

Sitecore comes with an impressive list of prebuilt conditions to drive personalization--from referring URLs to the fact that a visitor comes to the site as a campaign respondent to GeoIP attributes of country, zip code and more.  In many discussions I have on the topic of personalization, the conversation inevitably leads to "yeah, but I want to use THIS thing."

To generalize, the THIS thing is some existing system or service, external to Sitecore, which holds a key piece of information.  Since this external system should remain the system of record for that piece of information, it makes sense for Sitecore to simply leverage the data where it sits, rather than enforcing that it move directly into the Sitecore content tree.  For those of you that have worked with Sitecore, you know it’s built for this.  Rather than enforce a migration of data to the content repository, a well developed Sitecore strategy continues to take advantage of data and application functionality wherever it is best served from.  Personalization conditions are no different.

Below I will work through a common scenario.  We want to develop a condition that queries an external database and determines whether a product is available before showing the promotion our marketing team has created for it.  With the condition in place, it will be easy for us to build a rule that does something when the condition is true.  This is a classic “When” condition, and we can think of all kinds of rules that might be appropriate based on the true / false value returned.

Who in my organization creates these conditions?

As an aside, many of my conversations lately have involved questions like "who sets up personalization in Sitecore?”.  A very fair question.  I enjoy the discussion because it really highlights that there is a transition going on here.  Sure, every piece of conditional logic could be developed separately (it is software, and everything is possible), but the question is sparked because this capability is now in the hands of many more people in the organization.  It’s not JUST for developers anymore.  While developers are certainly creating the great methods that evaluate conditions and implement rule-driven functionality, others in the organization (you get to decide who) are mapping the business processes and visualizing the results.  These two sides are equally important, and those organizations who find the people with the right combination of skills will certainly benefit.

Creating the custom condition

Back to it.  1st step is to create an item to define the condition.  Who does this?  Well, in most cases this one’s for the developer.  The reason is that we’re coding brand new logic here.  If you’re talking about the rich set of standard Sitecore personalization conditions (Geolocation info, DNS info, authenticated user profile attributes, etc), then there’s no work to do here.  These Conditions are already defined and available to you as you build a rule to evaluate that particular Condition.  More on that later.  The screenshot below shows the beginning of the scrollable list of prebuilt Conditions:


In standard Sitecore fashion, all prebuilt Sitecore functionality is built and referenced in the same way you’ll build your specialized or customized functionality.  If you look in the Content Editor at:

/sitecore/system/Settings/Rules/Definitions/Elements/GeoIP/Area Code

you’ll see the definition (the Item in the tree) that represents the condition.  Even though this is a standard Sitecore Condition, we are still able to see where this code is called from in the core application (in this case, the Sitecore.Analytics assembly contains the code for this condition):

The Default "Area Code" condition in Sitecore


You’ll notice that the AreaCodeCondition class in the Sitecore.Analytics assembly is referenced.  You’ll also see that the Text field allows you to define placeholders where a content author can enter additional parameters to the condition evaluation (this Text appears in the Rules Editor when adjusting the specific condition for a personalization rule).

So for our purposes today, it’s going to be even easier.  Rather that doing a compare of values between Analytics data and content author entered parameters, we’re simply going to check the “trueness” of a condition.  Does the product have any availability?  Based on the result, we can then decide what to do about it.

A strategy for setting up custom conditions and rules

In regards to the question again about "who does what?", this is a typical thought process around setting up these types of conditional rules:
  • A cross-functional team discusses the Conditions that need to be evaluated.  Many will be available in Sitecore already, some will have to do with your business-specific data that Sitecore couldn't possibly know about natively.
  • A cross-functional team discusses the Rules, the things that should HAPPEN when a Condition is evaluated.  Again many will exist in Sitecore already (easily hiding or showing a control, having a control display a different piece of content, moving a control to a different area of the page, initiating a specific Email Campaign, etc.) and some will do fun and exciting things outside of the Sitecore application domain and context.
  • A cross-functional team discusses where and when these rules are appropriate, and which groups should have the ability to adjust the rule set.
  • A cross-functional team ensures that both sides of the brain communicate, and that the development efforts and the business process mapping stay on the same (albeit flexibly winding) trail.  
The point here isn’t that you need a huge cross-functional team.  The point is that if you’re a team of one (or 2, or 10, or 100), you need to think cross-functionally.  Nothing new here.

The three steps to implement the custom condition and rule

OK, so again for this example we simply want to rely on an external system to determine whether a condition exists.  We'll use the freely available AdventureWorks database from Microsoft.  The basic idea will be to:
  1. Add a new condition item to Sitecore (so that someone in our organization can choose the condition as part of their personalization rules for a control).
  2. Write a custom condition that looks to AdventureWorks to find out if there is product inventory for a certain product.
  3. Add our new condition to control on the Launch Sitecore home page so we show a different spot if the product is available.

Step #1

We need to add the new item to the content tree to reference our custom condition.  I put the item at

/sitecore/system/Settings/Rules/Definitions/Elements/Fields/

...so it would show up near the top of our list when we apply it to a control.

Our new custom condition

Since we're making the condition check very simple (we're going to always look for product availability for a product with an ID of 1), we don't need to set up the Text field with any macro replacement possibilities.  In the real world, we'd want to either allow an author to choose a specific product using this technique, or we could think about making that decision based on which page the control is on (i.e., a product page dedicated to a particular product could also pass that product ID directly to our inventory check routine).

Step #2

Now we need to write some code for the actual condition check.  The main Execute method is shown below.  Note that I used the freely available Entity Data Model Wizard within Visual Studio to set up an easy LINQ query to the AdventureWorks database.

        protected bool Execute(T ruleContext)
        {
            var numUnits = 0;
            try
            {
              using (AdventureWorks2012Entities context = new AdventureWorks2012Entities())

                numUnits = (from m in context.ProductInventories
                                where m.ProductID == 1
                                select m.Quantity).FirstOrDefault();

                return numUnits > 0;
            }
            Catch

            { return false; }


        }


Now, when a personalization rule includes this condition check, we'll simply go to the AdventureWorks database and check for availability of ProductID 1.  Since the conditional check is basically a true/false result, we'll return whether or not the product availability for that product is greater than 1.  With my new condition added to the content tree (described above), this is where we can see it (in the Fields section).  You can organize your custom conditions anywhere that makes sense.

Our new condition shows up in the list for a business user to choose


Step #3

Now we can add this to the simple spot controls on the Launch Sitecore home page, showing the Einstein spot if this condition is true.  Below shows the Page Editor view where I can add a New Condition to my control, calling out my check to AdventureWorks, and the "Step 1" content item the control will use as its datasource if my inventory check returns True:

Our new condition is now part of the Rule Set for our Home Page control

Hopefully this sheds some light on how achievable it is to consider external data personalization sources in Sitecore.  Taking the next steps and creating bridges to product catalogs, existing systems of record and web services can really open up your personalization options without changing repositories and services that already do their jobs incredibly well.

"I want my Sitecore Analytics data in Excel"

Why should I care about Sitecore in Excel?

No matter what you've spent on reporting systems (and business analysts to run those reporting systems), inevitably there are still spreadsheets all over your organization.  I can't think of a company I've been at or worked with that doesn't have at least one Excel Workbook that is the voice of truth.  The person that owns it has confidence in it--the data has overcome the skeptics, and the Excel interface is common to all and within everyone's grasp.

Sitecore data can now join in.  Let's forget about the "but I should have dashboards that tell me what to look at" crowd.  You know that if you get all this great data in Excel, you'll be in control and will start to highlight the insights and outcomes that is important to your business and your business only.  You'll pivot, shoot...score.

Familiar Pivot Tables and Charts

With Sitecore data in our OLAP cube format (more below), within about 15 minutes I created the Pivot table and chart below.  Our Sales Engineering group will certainly be looking at more insightful dashboards as we go, but these simple views can get us to the next stage of our discussion:  "How can we put together a customer journey that will promote the best possible software evaluation experience, leading to Sitecore being selected as the best choice in digital platforms?".

Sitecore Data in MS Excel Pivot Tables and Charts

Sitecore's Engagement Intelligence Datamart 

To get to this, we are using Sitcore's Engagement Intelligence Datamart.  This product provides the tools necessary to create a standardized OLAP cube from the Sitecore Analytics database.  Once in an OLAP format, virtually any reporting environment will "understand" what the data is all about.  OLAP will define Dimensions (the facets, categories, rows, columns) and Measures (the values, numbers, calculations) that the data is now available in, and we can immediately use the standard interfaces of Tableau, MS Excel, SQL Reporting Services, Sitecore's implementation of the Targit BI Suite or any business intelligence strategy you currently have in place.  We can start thinking about easily tying to other data sources, tying authenticated users to CRM records....sky's the limit here.

So, after following the Engagement Intelligence Datamart documentation, we have the OLAP cube in our SQL Server instance:
The Sitecore OLAP Cube Database in SQL Analysis Services

Right clicking on Cubes/Analytics node gives us the option to "Browse" the Cube.  This provides a design interface very similar to MS Excel, where we can drag the Dimensions and Measures from the Cube to a canvas where we can analyze all the prebuilt calculation goodness.  Below I simply added our Pattern concept in Sitecore and used the single measure of Page Views:


Exporting to Excel

From here, there's a nice little export feature to Excel at the top of the window:


You can also start in Excel and use the Data menu to create the connection string to your OLAP cube database on SQL Server.  The above export feature will create the connection for you automatically.

Now in Excel, we can take advantage of our familiarity with this application--Pivot Tables and Charts, Slicers and all of the easy-to-use data analysis tools that Microsoft has provided.  Below is the Pivot Table fields that will be immediately available to you.  Within the list, you'll be able to find common web analytics elements such as:
  • Page Views
  • Unique Visitors
  • Time Spent on Page
  • Engagement Value (unique to Sitecore)
...and much more.  Happy Pivoting.

Pivot Table fields available from Sitecore's DataMart / OLAP Cube


Wednesday, March 12, 2014

Preparing for your next great Sitecore Engagement Plan

In every partner and client session I facilitate, we inevitably spend a lot of time talking about Sitecore Engagement Plans.  It's a fantastic platform feature that ties all the pieces of a Sitecore digital marketing discussion together--from considering why a site exists in the first place to laying out the goals we want our visitors to achieve to the actions we want to take in the process of creating hugely successful digital campaigns and experiences.

By the time we're talking about Engagement Plans, though, I've realized that we've already covered a ton of information.  Sitecore's feature map is incredibly impressive and always too much to fully consider in one sitting.  When I started facilitating these sessions, I tried to have the group go through the actual mechanics of setting up an Engagement Plan in the system.  While these mechanics are straightforward, I realized over time that the importance of the discussion wasn't about the points and clicks to create the Engagement Plan in Sitecore--it was the about the customer journey we were setting out to model.

So, a very simple thing hit me over the head--start with a Visio template to act as the brainstorming tool.  While I still recommend in most cases just diving into Sitecore and creating Engagement Plans directly, I wanted to offer this file in case it helped anyone with their brainstorming sessions along the way.

Download the Visio Template Here.

The Visio diagram is a model of our Launch Sitecore Engagement Plan described here.  With this, you can quickly brainstorm:

  1. States along your Engagement Plan / Customer Journey
  2. Actions to take as a visitor transitions from State to State
  3. Conditional checks to determine whether a visit should move to a new State
  4. Customer experience as it relates to a particular state (personalization rules if a visitor is in that State)
  5. The behavior you are trying to drive, the endgame, the Goals.

Content-As-A-Service and the Sitecore Item Web API

Why you should care about the Item Web API

There are many great articles and videos about using the Sitecore Web API, many of which are much more complete and sophisticated than this post (for particularly impressive skill, see Mike Reynolds's work).  In this post I simply wanted to point out the basics and explain why you might be interested in this Sitecore feature (and, really, why you should be confident in the power of the Sitecore API in general).  So read on as a non-developer.  As a developer, you'll at least get a couple quick lines of code that might save you some time as you dive into things.

The Sitecore Item Web API documentation may be found here.  The latest version is 1.2, and the feature is now part of the core Sitecore install (as of 7.1).  The basic premise of this feature is to expose the Sitecore API to modern, RESTful web service calls, to return JSON responses, and (as is always a core tenet to Sitecore) to provide an extensible basis for modeling virtually any business and technical requirements.

In plainer English, this makes Sitecore-curated content available outside of Sitecore sites.  It allows you to ensure all of your content policies are followed (workflow, validation, security, publishing) before making that content available to additional groups or applications.  Sitecore-Content-As-A-Service.  (Feel free to use SCAAS and sound cool).  By providing a modern RESTful service layer, it makes your developers happy and allows them to use all the productivity tools they are using today.

To consider a very simple use case, I'll use our team's Launch Sitecore project and consider an area of content that I'd like to make available to an external application.  The "Team" section on the site lists all of our N. American Sales Engineers:

Setting up the scenario

Let's say that we're starting a separate project and we want to start by leveraging this list of SE's.  Maybe we consider Launch Sitecore to be the place where we first add new SEs once hired and where we have some additional statistics and information about the SEs (# of articles written, favorite quote, etc.).  By defining Sitecore as the system of record for this content, it frees us from worrying about content governance and consistency.

To keep things really simple, I tried to include as few lines as possible to accomplish this via the Sitecore Item Web API.  First, the final result of the new application page:

A simple list of Sitecore content items (without that pesky styling getting in the way!)

Next, the HTML behind the page


<!doctype html>
<html ng-app>
<head>
    <title>List of Sales Engineers</title>
    <script src="https://ajax.googleapis.com/ajax/libs/angularjs/1.2.14/angular.js"></script>
    <script src="../js/myangular.js"></script>
</head>
<body>
    <div ng-controller="CallWebApi">
        <ul>
            <li ng:repeat="item in data.result.items">{{item.DisplayName}}</li>
        </ul>
     </div>
</body>
</html>


A couple things of note on the above:

  1. I'm using angular.js to allow the javascript library to do all the heavy lifting.  The first script reference is to that library as hosted on Google's CDN.  The second is simply my project's local javacript file that we'll look at.
  2. All of the "ng-" stuff is standard angular.js usage.  The ng-controller will call out to my local javascript method that we'll discuss below.  The ng:repeat will allow me to iterate through all Sitecore items I receive back from my web service call, showing each item's DisplayName field in a bullet list.
  3. Take special note of the "data.result.items" syntax above.  The bulk of time you'll spend (probably with any JSON parsing exercise) is figuring out how to pull out the specific nodes and fields you are interested in.

The javascript to make the call and return the Sitecore items:


function CallWebApi($scope, $http) {
    $http.get('http://mvc71/-/item/v1/?scope=s&query=/sitecore/content/home/team/*').
        success(function (data) {
            $scope.data = data;
            console.log('success ' + data)
        })
        .error(function(data) {
            console.log('failure ' + data)
        });

The document on SDN does a great job explaining the possible operations and queries that you can make with the Item Web API.  For now, consider that you can do things like:

  1. Get Sitecore Items
  2. Create Sitecore Items
  3. Create Media Library Items
  4. Change Items
  5. Get back the HTML output of a rendering
For this scenario, we're simply getting some Sitecore items and using their fields.  The query above makes a request to Sitecore to get back all the items in the "Team" area of our Launch Sitecore content tree.  In my case, that result becomes available to my angular.js within my page to list out DisplayNames for the Sales Engineers.  Below is the structure of the JSON that we receive back from the request:


In Summary

While this is a very modest use case, this really provides the foundation for incredible real-world use cases within your organization.  With Sitecore as the content hub, you are able to ensure your content-as-a-service project is fully governed.  Your mobile apps and sites will benefit from the "create once, use everywhere, maintain once" pattern this promotes.

The Item Web API is fully extensible and built on the same core pipeline architecture that drives everything in Sitecore.  Because of this, additional features and methods are able to be easily added to the standard set, and virtually any external application content need may be serviced by Sitecore.